Friday, April 29, 2016

Gray Stripes and Florals


"Flowers always make people better, happier, and more helpful; they are sunshine,
food and medicine for the soul." ~Luther Burbank

I recently purchased some paper crafty friends recommended for Zig Coloring and I don't think I will put these markers down now! The Strathmore Bristol Smooth Paper is perfect for this medium.


I created a floral array, stamping in gray and coloring in with the zig markers. I added a sentiment from Essentials by Ellen 12 Days Companion Greetings Stamp Set (I thought the clean and precise font was a perfect match for the flowers from Altenew's Beautiful Day Stamp Set) and then adhered this panel onto a gray card base. I bordered the panel with some gray stripe washi tape and finished the card with a bow from white embroidery floss.

The design, colors and use of the striped border on my card was inspired by the
Ellen Hutson's April Pin-Sights Challenge


and the layout by Freshly Made Sketches #234


LDRS Creative Hop


I was lucky enough to be sent some fun products from LDRS Creative to play with and I created two cards with the same products.


For my first card, I started by inking up a soft background of patterned paper, in which I stamped a beautiful greeting from the LDRS Creative Stamp Set, You. I adhered a beautiful paper banner die cut from the LDRS, Basic Cutting Borders 1. Then I wrapped the panel with antique gold ribbon and tied with a bow, along with a second bow made from burlap string. I attached the decorated panel to a card base and finished the card with a handmade bead pick.


I went a more masculine route with my second card, using the same stamp set and die from LDRS. After trimming a patterned paper piece to size, I spritzed white paint to make a galaxy and added a moon made out of lighter paper and the Borders Die. I embossed in white the sentiment and before adhering the decorated panel to the cardstock base, I tied a knot made from various silver ribbons.


That's it for me today!


Wednesday, April 27, 2016

Stargazers


One of the many things I like about creating cards is that you can pretty much customize your stamps and scenes to make them your own-as realistic or abstract as you want...or you can mix and match, right? For instance, I know that stargazers don't have straight, skinny stems, but they do on my card!


I stamped three lilies from the beautiful Craftin' Desert Divas Botanical Layers.
I only used one of the layered stamps, choosing to color the blooms in with Copics and accenting with a white gel pen. After I had these colored and fussy cut, I created a panel to adhere them to by inking up a corner of white cardstock with blue ink, then drew three lines with black markers for stems. I stamped a sentiment from Simon Says Stamps Happy for You Stamp Set in black. The bloom panel was adhered to black cardstock, cut just a tad larger than the white panel, and then this was adhered to a white card base.


Supplies:
MISTI
Neenah Solar White 110lb Cardstock
Tombow Mono Multi Adhesive
Simon Says Cardstock
Hero Arts Intense Black Ink
Copics
Uni-Ball Pen Signo Gel, White
Craftin' Desert Divas Botanical Layers Stamp Set
Simon Says Stamp Happy Everything Stamp Set
Peacock Feathers Distress Ink
Ranger Ink Blending Tool
*affiliate links used if possible 

Monday, April 25, 2016

Papertrey April Blog Hop Challenge


I had so many ideas for this hop, as the inspiration picture was so graphic and cool! I ended up running out of time, and the soft, vintage direction I started out with was the only card design I got to pursue.


I was inspired by the various shades of the same color, so stamped the solid image of Modern Basics in a soft pink, then added the outline and the inside leaves with the same pink. I inked the edges and wrapped the panel with some linen thread, having been inspired by what looks to be stitched lines in the inspiration graphic.


I added a sentiment stamped in kraft ink and mounted the panel with dimensional adhesive onto a kraft card base.

Friday, April 22, 2016

Bokeh


My late, late evenings on the weekends I do not have my boys are often spent watching crafty or make-up youtube tutorials. Last weekend, I stumbled upon this really neat video, showcasing how to create a bokeh effect on cards. I decided to give it a go, and while the results might not be as pretty as the ones in the video, it was still fun to try something new!


I created my background following the steps in the video, choosing to work with the cool toned colors of green, blue and yellow. After laying down the watercolor and letting it dry, I stenciled a series of circles of various sizes using white pigment ink.


Then, after the panel was fully dried (as in a day!) I heat embossed in white the very beautiful greeting from Right At Home's Script Greetings Stamp Set. To make the sentiment pop even more on the busy background, I highlighted with cool gray Copics the underside of each letter. I really like how much it made the beautiful sentiment pop! I finished the card by adhering the watercolor panel to a white card base and wrapped the front with May Arts 1/4" Silk Teal Ribbon, tying a bow at the very end.

I followed the sketch at Cas(E) this Sketch 169 and am also entering this into MarkerPop! Challenge 93: Anything Goes.


Tuesday, April 19, 2016

LID:: April 2016 Release:: Day 3


Welcome back to the third and last day of the Lil' Inker Designs April 2016 Release!
As usual, we have a fabulous hop for you featuring innovative stamps and dies!
You should have arrived from 
Angel Rivera's Blog!(Stop by the Lil' Inkers Design Store Blog for more details and the hop order.)

Yesterday, I featured a card especially for the ladies in your life, today I have one for the guys! I created a fun shaker card featuring Clean Lines for the Guys Stamp Set and coordinating Clean Lines for the Guys Die Set. This set has simple, clean and utterly awesome automotive images and sentiments.


I created the shaker with the help of the Stitched Mats: Dual Stitched Rectangles. The base of the shaker is aluminum foil, then I added a layer of fun foam, an acetate rectangle, my shaker items, and then a finished rectangle die cut. The shaker items are wrenches from Clean Lines for the Guys (simply colored with gray Copics and die cut!), die cut stars from Starry Sky Die and some glitter. I adhered the shaker piece to a white cardstock base, bordering the edges with a black die cut pieces. I used the Stitched Rechatnagels pieces to add a line of stitching before adhering these black pieces. Then I finished the card with a sentiment from Clean Lines for the Guys. I think it is a lot of fun!

And for my final card, I am showcasing the adorable Kite Flying Stamp Set and coordinating Kite Flying Dies, along with the innovated Fringed Scalloped Rectangles Dies!


Look at the fun dimension and interest with little work the the Fringed Scalloped Rectangles Dies adds! What I did was die cut the front side of the card base with the Fringed Scalloped Rectangles Dies, raised each of the scallops up just a bit, and then adhered a piece of orange carstock to the inside front of the card base, causing little peaks of orange! I then watercolored washed a panel, and then die cut and watercolored some items from Kite Flying and adhered them into a little scene.

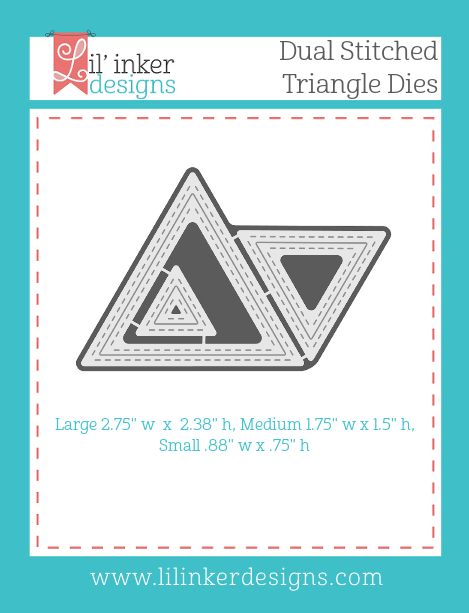
Here are the product images of the new release items used on my cards today!


It's an amazing release, right? What are you favorite products? I'd really love to hear! Do you have any requests for follow-up shapes for the Fringed Scallop Line or more Clean Line sets?? Please let me know!

Your next stop on the hop is Jennifer Carter!

Don't forget to leave a comment along the each of the stops on the hop, as there are three $15 gift certificates up for grabs to the Lil' Inker Designs Store!


Monday, April 18, 2016

LID:: April 2016 Release:: Day 2


Welcome back to the second day of the Lil' Inker Designs April 2016 Release! Not only are there three new design team members, but there is, as usual, amazing products being released this month! Once again, we have a fabulous hop for you featuring innovative stamps and dies! If you are following the hop, you should have arrived from Jennifer Carter's Blog! (Stop by the Lil' Inkers Design Store Blog for more details and the hop order.)

Today I am showcasing the absolutely beautiful Vintage Flowers Stamp Set and coordinating Vintage Flowers Die Set, along with their companion Vintage Label Sentiment Stamp Set and coordinating Vintage Label Die. Aren't they gorgeous?!

I started by stamping and die cutting all the flowers from the Vintage Flowers Stamp Set, colored them with Copics and added a touch of shimmer to the larger blooms with a glitter pen. I also stamped the label and sentiment and die cut it as well. I really love the mix of sentiments in this set, perfect for pretty much any female in your life. Such lovely greetings as well! I then arranged the blooms, leaves and stems into an arrangement and adhered them on my lavender card base. I wrapped the card with black embroidery floss and then adhered the label with dimensional foam adhesive. I finished the card with a spattering of black rhinestones.


I had so many ideas with the Tribal Chic set featured yesterday, I have another card to showcase today!


I created a pattern using a few of the strips from the set and aqua, pink and gold ink. I stamped a sentiment from the set, inked the edges and wrapped the panel with Natural Burlap String, knotting the ends. I adhered the panel to a cardstock base. Love the bohemian feel!

I mentioned this yesterday, but aren't the new products I used in my projects today just amazing? (Laura has put together a guide for stamping the Vintage Flowers that can be found at Lil' Inker Designs.)


Your next stop is another one of our newest design team members, Stephanie Gold!


Don't forget to leave a comment along the each of the stops on the hop, as there are three $15 gift certificates up for grabs to the Lil' Inker Designs Store!

Sunday, April 17, 2016

LID:: April 2016 Release:: Day 1


It's finally here! It's the first day of the Lil' Inker Designs April 2016 Release! Not only are there three new design team members, but there is, as usual, amazing products being released this month! Once again, we have a fabulous hop for you featuring innovative stamps and dies! If you are following the hop, you should have arrived from Lil' Inkers Design Blog! (Stop by there for more details and the hop order.)

I am starting off with my favorite project created for this release. I used the fabulous Tribal Chic Cover Up Die on a vanilla card base and then applied a soft sponging of yellow, blue and tan inks. I then inked the edges with a brown ink. Inking after I embossed the panel let the ink settle into the debossed areas, highlighting them even more. I wrapped the panel with Natural Burlap String from May Arts and mounted this to a card base with foam ahesive. I finished the card with a die cut sentiment from the previously released Thanks Word Die and a few sequins.


My second card uses three new products being released this month.


I started by die cutting a series of triangles from the Dual Stitched Triangle Dies onto light green cardstock. Before mounting this to a card base, I inked the edges and adhered just one of the amazingly fun patterns from the new Tribal Chic Paper Pack. This paper has some really great colors in it, a wide variety of colors, that matching solid cardstock was a breeze. I finished the card with a Natural Burlap String wrapped bow, enamel dots and a sentiment from the new Tribal Chic Stamp Set.


Aren't the new products just amazing?


Your next stop is one of our newest design team members, Angel Rivera!

Don't forget to leave a comment along the each of the stops on the hop, as there are three $15 gift certificates up for grabs to the Lil' Inker Designs Store!

The Gnome's First Appearance


I have an aunt that is like a second mother to me. She goes above and beyond for just about everyone. One of her hobbies includes gardening, and her plants absolutely flourish under her green thumb. She's provided some good gardening guidance this spring. She's done so much for me lately, I wanted to send her a happy card. Yes, this card really is going in the mail!

I followed along with both the MFT Sketch Challenge #276 and MFT Color Challenge #43.


I stamped one of the cute fellas from You Gnome Me onto speckled vanilla cardstock, masked a portion of him and then stamped two mushrooms. He received some coloring with Zig Real Clean Brush Markers and a soft outline with blue Copics. His beard received some texture with the fluffy white paint, although I only applied a thin layer. I then created a border with green cardstock using the MFT Fresh Cut Grass Die-Namic and added a sentiment made from the MFT Hello There Die-Namic

Please check out my cards and posts on instagram and follow me!

I am also playing along with the MarkerPop Challenge #92: Spring! I love this time of year when I can finally get out and start weeding, taking care to pull just the weeds and not the perennials that are just starting to come up.