Saturday, January 30, 2016

Chase's Card

Please scroll down or click here for the
Lil' Inker Designs:: January 2016 Release:: Day 3 post!


I don't blink twice when one of my sons asks to make a card with me!


Chase (age nine) and I decided that it would be fun to participate in the Coolest Card Series Contest
and create a winter-themed card featuring stencils and Paper Smooches. We started by laying a Studio Calico Stencil, featuring a series of various sized open circles, onto white cardstock and sprayed some white shimmer mist. Then we layered some textured matte white mist on top of this and let it dry. He enjoyed squirting the spray! We carefully cut the white cardstock into a snowdrift using Lil' Inker Design's Border Builder Die Set, then mounted it onto an aqua cardbase. 
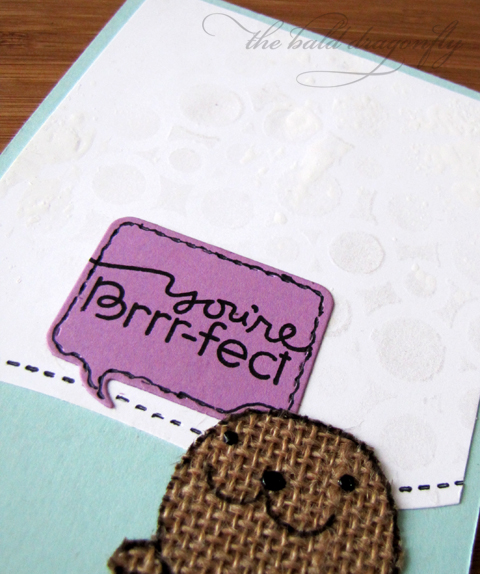

Then he chose some burlap paper to stamp the cute seal from Paper Smooches winter set, Chilly Chums, and I fussy cut him out-Chase was scared he'd amputate a leg. We added some Black Enamel Accents to the nose and eyes, and both audibly uttered a sigh that it didn't get messed up. He chose the sentiment, also from Chilly Chums, and we stamped that onto a die-cut speech bubble from Lil' Inker Designs Speech Bubble 2 Die Set. He thought the card needed something else, so he carefully traced all the stitching on each of the elements with a black marker.

So proud of this guy, this was his design and I just assisted!

We are also entering this into Simon Says Wednesday Stamp Challenge: Anything Goes and the Simon Says Stamp Work It Wednesday January 2016 Challenge: Use Something New (hadn't used the Studio Calico Stencil, it was fun!)


Friday, January 29, 2016

LID:: January 2016 Release:: Day 3


Welcome back to the third and final day of the Lil' Inker Designs December Release! As usual, we have a fabulous hop for you featuring innovative stamps and dies, I hope you enjoyed this amazing release! You should have arrived from Amy Kolling's Blog!

Did you know that Lil' Inker Designs updated some of their stamp sets to match top selling dies? Take for instance, the fun Original Pinwheel Die and Mini Pinwheel Die. The coordinating stamp set, Pinwheel Sentiments, is absolutely perfect with its whimsical font and stand-alone sized sentiments.


I created a pinwheel from the Original Pinwheel Die, double-sided paper and brad, then attached it atop a twig. I tied a tag that had been stamped with a cute sentiment from the Pinwheel Sentiments Stamp Set and die cut from the Pinking Edge Sentiment Flag Die Set with May Arts Ivory Burlap String. I'm going to place this in the windowsill of my office...waiting for spring!


The above clean and simple, and happy! card was created by adhering some die cut clouds from the Rainbow and Clouds Die Set and sun with the Sunshine Die Large (there is also a smaller version here), and a stamped sentiment from the newly revised Sunshine Sentiments Stamp Set. I added a smiley face to the sun, just because, from the Boo & Faces Stamp Set. A perfect cute compliment!


I have one more card to show, and it has a fantastic newly released product, Silly Stitched Die Set, along with a revised product mix of the Coffee Cozy Stamp Set and Coffee Cozy Die Set.


I started this card with a white cardstock base with two strips of gold washi tape affixed to the left side. I then embossed a circle from the cool Silly Stitched Die Set and swirls from Coffee Cozy Die Set. I then created a coffee cup from the Coffee Cozy Die Set and paper from the newly released Love You Paper Pack. This was so easy and quick! I finished the card by stamping a sentiment from the Coffee Cozy Stamp Set and  a wrap-around baker's twine bow.


Well, there you have it. So many fabulous products from this 2016 January Release that work well with all the other fantastic Lil' Inker Designs products.

Your next stop today is Sarah Jay!!

Don't forget to comment along the hops, as there are three $15 gift certificates up for grabs to the Lil' Inker Designs Store!

Thursday, January 28, 2016

LID:: January 2016 Release:: Day 2


Welcome back to the second day of the Lil' Inker Designs December Release! As usual, we have a fabulous hop for you featuring innovative stamps and dies! You should have arrived from Chrissy Larson's Blog!


I tried my hand at a shaker card, because the new Love You Greeting Die is perfect for this style of card! I die cut a rectangle from the beautiful, new Love You Paper Pack with the Stitched Mats: Dual Stitched Rectangles and adhered it to a cream, speckled cardstock base. I then die cut the Love You Greeting Die from the cream, speckled paper as well, and topped that onto a piece of acetate die cut from Stitched Mats: Squares and added foam tape for dimension. I then added my "sprinkles" before adhering the focal piece to a piece of red patterned paper from the Love You Paper Pack. I finished the card with a wrap-around bow from May Arts Waxed Cord in Red.


Fun (and awesome!) Time Saving Fact: Did you know that the Lil' Inker Designs' Greeting Dies line (Love You Greeting Die, Boxed Up Birthday Greeting Die, Merry & Bright Greeting Die, Boxed Up Thank You Greeting Die)  are made to coordinate with the Stitched Mats: Squares and Stiched Mats: Dual Stitched Squares along with the Dual Dotted Squares so you don't have to worry about trimming anything?


I wanted to showcase how the products from this release, although centered around Valentine's Day, can be used for all year round projects. For the above card, I die cut a stamped, colored giraffe from the Lovie Friends Stamp Set and Lovie Friends Die Set. Then I die cut a heart from the new Dual Dotted: Hearts die set from the new Love You Paper Pack and inlaid that into an yellow inked cardstock panel that had a heart die cut from the Stitched Hearts Die Set. I love how well these products nest into each other, no matter what release they are from! So many possibilities. I stamped a greeting from a previously released stamp set called Send Pretty Greetings, and then affixed this panel to a white cardstock base and flanked it with some polka dotted washi tape. I adhered the giraffe and finished the card with a wrap-around baker's twine bow.


Your next stop is Maureen Merritt!

Don't forget to comment along the hops, as there are three $15 gift certificates up for grabs to the Lil' Inker Designs Store!

Wednesday, January 27, 2016

LID:: January 2016 Release:: Day 1


It's the first day of the Lil' Inker Designs January Release!

(There was a wee bit of a mix-up so this is the second time posting, if you commented yesterday, PLEASE comment again today for your chance to win! Sorry for the confusion!!)

If 2016 starts out with these amazing products, I KNOW it is a going to be a great year. As usual, I love the new products, and I am pretty sure that you will too. Once again, we have a fabulous hop for you featuring innovative stamps and dies! You should have arrived from the Lil' Inker's Design Blog!

I'll start with my favorite card I made during this release. It was so simple to put together, and (I think, but I might be biased) that it is so cute! I first embossed a kraft card base with the previously released Cover Up Die: Stitched Woodgrain (see that heart right above the bear? Love!) and then die cut the word "Hugs" from the new Valentine Word Tags Dies from the new, beautiful Love You Paper Pack. I simply trimmed off the tag. To finish the card, I die cut the cutest ever little bear from the new Lovie Friends Stamp Set and coordinating Lovie Friends Die Set, adhered him to the card, colored the heart and applied glossy accents for some shine to match the paper, as it is made from the Ultrasmooth Premium Cardstock and so beautiful.


This next card also features the Lovie Friends Stamp Set and coordinating Lovie Friends Die Set, as well as the Valentine Word Tags Dies and Love You Paper Pack.


I stamped, colored and die cut the lion from the Lovie Friends Stamp Set and Lovie Friends Die Set and adhered him to a peach cardstock base. I then die cut the word Love from the Love You Paper Pack with the Valentine Word Tags Dies and once again cut off the little tag. I finished the card with a some words from the previously released Sending You Stamp Set to finish my sentence. I like how this card features the Lil' Inker Designs Valentine's Day products but is not for Valentine's Day!


Your next stop is Heather Hoffman!

Don't forget to comment along the hops, as there are three $15 gift certificates up for grabs to the Lil' Inker Designs Store!

The Ribbon Resource:: Stampendous 2016 Hop


The Ribbon Resource is again teaming up with Stampendous for a really fun blog hop featuring both their products. I have two cards to showcase today, and they couldn't be more different from each other!

This vintage based started with a dark aqua card base and a strip of patterned paper. I bordered the paper with 5.5" length of the 1.5" Ivory Sheer Ribbon with Butterflies and a 5.5" strip of 7/8" Crochet Ribbon in Ivory and a bow from my most favorite ribbon ever, Natural Burlap String. I then layered two butterflies I cut from the Sheer Ribbon with Butterflies, wrapped some string around the belly and adhered it to the card base under the Burlap String Bow. I then finished the card with a beautiful sentiment from Stampendous' Life Words Perfectly Clear Stamp Set.


Switching gears, I stared this clean and simple card with a kraft card base that had been stamped and embossed with a retired Stampendous called  Dino Time and embossed with the masculine colors in their Spring Sparkle Embossing Powder Kit. I added a sentiment from Stampendous' Wild Sayings Perfectly Clear Stamp Set and finished the card with a double knot wrap-around in coordinating colors of Burlap String in Parrot Green and Yellow.

Of course, standard with The Ribbon Resource's Hops, there are prizes up for grabs! The Ribbon Lady is giving away a few gift cards to The Ribbon Resource so you can pick out your own ribbon if you are a winner! Complete details are on The Ribbon Resource Blog.

Here's the hop order for all the days of the hop:

Monday

Tuesday

Wednesday

Thursday

Friday

Monday, January 25, 2016

Papertrey January Blog Hop Challenge


I'm joining in on what I think is my first ever Papertrey Ink Blog Hop Challenge. I thought that the inspiration this month was so modern and graphic, and a lot of fun.


I used the Lovely Layers Dies and Stamp Set to create my card. Off to see the other inspiration!

Green Puppy


Woo hoo! The Panthers are going to the Super Bowl! I think I might be the only Panther fan living in Wisconsin, but that's ok! I've got a clean and simple card I made with things "found" while cleaning and purging my crafty area this past weekend. The puppy was already colored and cut, I think it was when I first got some Copic Markers and had to try them out. I adhered him to a yellow card base that was stamped with a row of polka dots (which you can hardly see because of the photograph), some trips of patterned paper and black washi tape.


The adorable Sav left a comment mentioning that I could enter this in the January Paper Smooches 4 Color Challenge, so I think I will! Blue, Aqua, Green and Yellow!


Sunday, January 24, 2016

Woodgrain Neutral


The making of masculine cards is tough, isn't it? However, sometimes those guys need a card too, therefore I took on the inspiration picture at Fusion Challenge to create a masculine card.


I was also inspired by the Wplus9's Throwback Thursday Challenge #11, as it seems that I don't have many current stamps with the exception of one company's products.


I chose to CASE the layout of Maureen's second card with the help of Wplus9's Folk Art Florals Dies cut in navy and cream patterned paper and solid vanilla cardstock. I adhered these leaves to a patterned paper woodgrain piece of paper and wrapped with some May Arts Natural Burlap String.

Still working on cleaning the crafty area...still getting distracted with products I find (like the woodgrain patterned paper!)

Saturday, January 23, 2016

One Layer So Sorry


I was in the process of cleaning and purging my crafty area, and I stumbled upon this long forgotten, but utterly beautiful retired Hero Arts Set, So Sorry. It is one of my few sympathy sets and I just can't let it go.


Even though this set is retired, I stopped cleaning (hah! it wasn't that difficult) and created a one layer card for A Blog Named Hero's One Layer Challenge. I started with a white cardstock base and masked strips off with washi tape. I then added a mixture of blue distress inks, removed the masks, and added more inks. Then came a few dots of water. After that was dry I stamped the vine in black, as well as the sentiment. I hope by adding some May Arts Black Burlap String doesn't disqualify the card from being one layer...I really like the texture it adds to the card.

I hope that I am not the only one that: 1. can't let certain, old stamp sets go and 2. gets distracted when cleaning a crafty area.

Friday, January 22, 2016

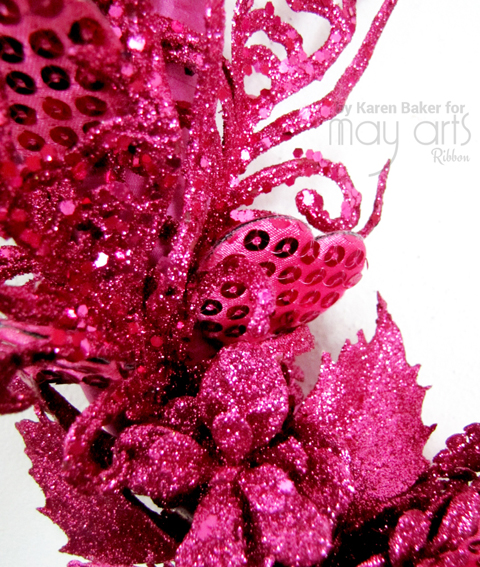
The Ribbon Resource:: Monochromatic Valentine Wreath


Ahh, the beauty of monochromatic design that lets the textures and details of the project shine! I am showcasing a wreath I made for the Valentine's Day Holiday over at The Ribbon Resource Blog (along with a with a quick tutorial!). If you are interested in the full reveal, please pop on by!